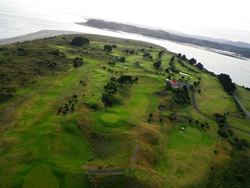
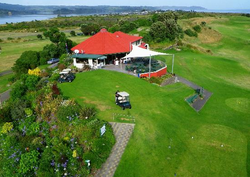
OHOPE INTERNATIONAL GOLF CLUB
Ohope International Golf ClubHarbour Rd
Ohope Phone:07 3124486 Email:[email protected] Website:www.ohopegolf.co.nz |
MEN BLUE
MEN WHITE
WOMAN YELLOW
course layout
FRONT 9
HOLE 1 (par 4)
|
You need to get a straight tee shot away, not that long, possibly a hybrid or 3 wood. The second shot is the money shot. The green is approx 30mtrs deep, the front third severely sloping back towards you. Carry this portion and your ball will not roll back to the front collection pointOver the green is not a good look either, severely sloping away from the green. Once you are on the green good luck, slopes from back to front, left to right.
|
HOLE 2 (par 3)
|
Great par three. It's hard to hit a pure 4 or 3 iron this early in the round, large pot bunker on the right of the green 20m short though, so if you carry this you should be on the green. Watch out for the little pot bunker left of green, great to catch that short draw ball. The green is approx 20m deep by 30 wide sloping left to right - happy putting.
|
HOLE 3 (par 4)
|
Tough hole. If the prevailing NW wind is blowing it will be coming at you from about 2 o’clock. A good drive will leave you any where from 160 to 100m from the elevated green. Be sure to take an extra club, as you may have to deal with the severe drop offs both right and left of the green. The green is approx 30m deep by 20 wide with a small tier in the middle. There are some great borrows in this green so take your time reading your putt. Hey, if the golf is already turning to custard, don’t worry, turn around and take in the view.
|
hole 4 (par 3)
|
Not as daunting as the numbers are. A 30m drop in elevation to the green, out of bounds down the right, and two greenside bunkers on the left. Strike a good 3 iron/ 3 wood and you are there. The green is approx 40m deep and 15 wide, 2 tiers sloping right to left. Tip for putting, be on the right tier.
|
hole 5 (par 5)
|
A birdie hole at last! A slight draw off the tee is good as you can carry the mound and kick on. Be accurate though - 2 pot bunkers on the left of fairway at 240m from tee, 1 little pot and 1 huge bunker on the right at 230m to catch the straight shot or little cut. The second shot is where you can get to the green all things being equal, be aware of the bunkers either side of the green and the out of bounds on the right.
Once on the easy flat green you've got no excuses! |
hole 6 (par 4)
|
Slight dog-leg right. Out of bounds on the boundary fence on the right and if you put your ball in the harbour it won't be alone. Placement off the tee is paramount. Check where the pin is and play left or right accordingly, being mindful of the big pine tree. There is a large pot bunker in the front right with a big collection area so make sure you carry all the way to the green. There is a second bunker behind the first just in case you missed the first. Magnificently sloping green, read your putt well!
|
hole 7 (par 4)
|
Probably the hardest hole on the course. The drive is the easy part. Just get it down there long and straight. Depending on the strength of the wind you are left with anything from a lay up (did I mention the pond in front of the green) to a good 3 wood or a wedge. The pond finishes about 20m short of the green so there is a little room for a miss.
Once on the green you again got some serious undulations to deal with - good luck! |
hole 8 (par 5)
|
Doesn’t play as hard as the stroke says. A straight drive leaves you an uphill lie for the second, slightly blind, but straight again is good. The third is the money shot, pot bunkers left and right front and right back. The right front is the deepest and a good test. Relatively flat green approx 35m deep by 20 wide, par or birdie should be had.
|
hole 9 (par 4)
|
Normally into the wind with a whole lot of trouble right, a deep blue tee allows the green staff to stretch this hole out.
Get your drive down the right side of the fairway to allow a better line into the green. Club choice is from a 3 wood to a wedge depending on the strength of the wind. If you miss the green short or to the right is ok, left is dead. The green is 40m deep 15 wide with a massive slope left to right, gauge your length well in your approach or you will have a very strong chance of a three putt. |
BACK 9
HOLE 10 (par 4)
|
Hard dog-leg left, internal out off bounds down the left of the fairway. The drive has to be long enough to open the green, otherwise put the drive further right to suit. A straight drive of 220m will do the job. The second is a pretty straight forward shot, bearing in mind all the uneven stances that a links course can provide. The green is one of the flattest, approx 30m by 30.
|
HOLE 11 (par 3)
Hole 12
|
If you can carry your drive 210m or more this is a birdie hole. Aiming just left of the pine tree you will have a simple wedge in. If you don’t carry that far you will be stopped by a large ridge and have approx 160 min.
The green is our smallest, approx 20m by 20 ,with a false front of about 5 metres. Long is good, simple putting - good luck for your birdie! |
HOLE 13 (par 3)
|
Great par 3. Off the Blue tee, must carry 100 mtrs or you will lose your ball. There are bunkers left and right of the green. The green is approx 40m deep and 15 wide, carry it all the way and relatively straight forward. Left of green is dead - good luck! Straight forward putting but harder than its 14 stroke index.
|
HOLE 14 (par 5)
|
Recently nominated as one of the top most 100 picturesque hole in New Zealand. Real links hole, all undulations including the green! A good drive down the left of the fairway will set the hole up. Your second should leave approx a wedge left. The rough down here is particularly punishing so keep it straight. The green is approx 50m deep 25 wide with a huge tier towards the back with lots of subtle breaks. Take some time to read your putt or you could be made to look awfully silly! There is a large pot bunker on the back right corner to catch the long ball.
|
HOLE 15 (par 5)
|
Plays longer than the 14th, mainly due to the wind direction. Keep it on the fairway all the way down and it’s a lot easier. If you are a cutter of the ball off the tee, scary, we think there is still some unknown animals out there! The fairway shapes off to the right for the second shot. Follow it as the rough is punishing. The third shot, less than 100m, needs to be accurate. The green is approx 35m by 20m slope left to right with a big collection area right that gets used a lot. Straight forward putting, two 5s here sets up a good back nine.
|
hole 16 (par 4)
|
A true risk and reward hole. Severe dogleg right, put it 180m straight down leaves you 100m in. If you are confident you can have a go across the corner but be aware that the trees catch a lot! The green is our most undulating, approx 25m by 25 make sure you leave yourself an up hill putt. This hole has ruined many a good round!
|
hole 17 (par 3)
|
If you are an early morning or dusk golfer keep an eye out for the pure white pheasant, she lives up to the left of the 17th! The elevated green gets most people the first time around. It is approx 10m above the tee therefore changing club selection dramatically. If you don’t land on the green it will run back at least 10m.
The green is approx 20m deep by 30 wide, small tier at the back, on the green and you should bag a par. |
hole 18 (par 4)
|
An awesome looking hole. If you get a straight 220m drive away you will carry the ridge and have less than 100m in. If you don’t the hole gets a whole lot tougher approx 160m left to a target green. The green is approx 30m deep by 20m wide sloping from the back to front with a tier towards the back. The drop offs left, right and front are severe so make sure your aim is good. If you can give yourself an uphill putt, makes the beer taste better!! Well done I hope you have enjoyed your round and if you have played to or better than your handicap you should be very satisfied, a tough track the first couple of times.
|

